
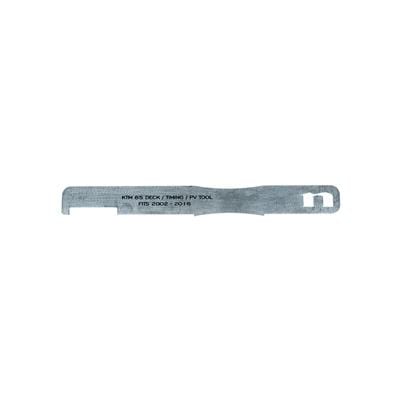

KTM/Husqvarna 85 Timing/Deck Tool Stainless Steel 2002-2017
Nihilo has developed a Stainless Steel Deck Tool that is a fraction of the cost of the OEM special tool. The OEM tool retails for over $94.00 while the Nihilo Concepts tool is only $14.95. The stainless steel is durable and strong and will last for many years. Nihilo uses a laser to precision cut each tool the laser assures that they are exact copies of the OEM specification and will work on your bike perfectly every time. You must have this tool to properly set the deck height, timing and power valve on your KTM if your head is not set up per factory specification you run the risk of stator failure and will have an improperly tuned motor. See video below and Technical specs for instructions.
Video voice over/instructions:
Let’s take a look at the tool and learn the three different adjustments that can be done with it. First locate the deck height curve this is found on the edge of the tool and is the one that does not protrude below the edge of the tool. The first shape will be used to set the deck or cylinder height. Next on the opposite side of the tool you will find the timing adjustment, this is shaped just like the deck side but protrudes down from the tool to the exact dimension in order to set the correct timing after the deck has been set. The third adjustment that can be done with the tool is the power valve and we will explain further how that is achieved later in the video.
The purpose of this video is to demonstrate the proper way to use the nihilo deck and timing tool on your KTM 85 and 105. There are specific tools for each size bike however the procedure is the same for both. It is very important to properly adjust the deck and timing of you KTM every time you are changing the piston or do any work to the bottom end of the motor. You bike will run at its best when properly set up using the Nihilo Tool.
Let’s start by draining the coolant and removing the cylinder head.
Also remove the ignition side cover and gasket to make it easy to move the piston up and down during this adjustment.
For this adjustment we will also want to remove the “o“ring head gaskets be careful not to damage them during removal, if they are new and undamaged you can reuse them if you’re not sure it’s best to get new ones.
Start by placing the tool on its edge with the deck adjustment side facing down, turn the flywheel with your hand to bring the piston up to TDC (Top dead Center)
you may find that the piston goes above the top of the cylinder and pushes the tool up if this happens you will need to install a thicker base gasket below the cylinder, if there is a gap between the cylinder and tool you will need to install a thinner gasket.
The purpose of the tool is to determine the perfect size base gasket required to position the cylinder so the tool is barley touching the tool when at TDC. It may take a few tries to get it right we suggest removing the ring when making the adjustment so it doesn’t get damaged when removing and reinstalling the cylinder.
When you have determined the correct gasket or series of gaskets go ahead and install the cylinder permanently making sure the ring is reinstalled and the base nuts are tight.
Now that you have set the deck height we can continue to the timing adjustment.
Start by turning the tool over with the timing side down place it up on edge with the small protrusions inside the center of the cylinder. With your other hand turn the flywheel until the piston comes up and touches the tool snugly.
Make sure you are on the correct stroke to get the timing marks close.
While keeping the tool and piston touching snugly Loosen the stator bolts and turn the stator until the degree mark on the stator lines up with the mark on the flywheel and tighten the bolts.
It may be necessary to check this a few times to make sure you get it right its better if you have a friend help hold the deck tool while you make the adjustment because it’s easier with three hands.
Now you have the deck and timing set and can move onto the power valve adjustment. The power valve regulates the size of the exhaust port at different RPM’s and it is important to make sure it starts in the correct location. The tool will give you that location and its pretty easy to do. (delete video part of me turning motor up, with my arm in the shot)
With the head still off and the power valve cover removed bring the piston to BDC (bottom Dead Center) to get it out of the way of the tool.
Insert the tool with the notch side facing the front of the bike and set the top edge on the top of the cylinder. The gap in the tool is the correct dimension that the power valve flap should be from the top of the cylinder so make sure the power valve is inside the notch.
Loosen the two Allen bolts and slide the plate until the tool can be held in with the pressure generated at this point tighten the Allen bolts and check to make sure the power valve flap is set so it matches the gap in the tool. This also may take a few tries but getting it adjusted correctly will be worth the trouble in performance.
Now you have successfully set your deck, timing and power valve adjustment thank you for watching.
If you have any questions call toll free 855-4Nihilo
Fitment:
- 2002-2017 KTM/Husqvarna 85